I’m not much of a conflict/war gamer. Direct aggression just doesn’t seem to be something I enjoy. I tried Blood Rage once and it wasn’t for me, Cubra Libre for some reason gave me headaches, and playing Clash of Cultures put me in a state of such anxiety that it caused me to preventive strike on a friend of mine’s culture, almost completely wiping him off the board, just out of fear of being attacked. For some reason, I always liked Wallenstein and its later iteration Shogun, but otherwise it’s pretty much Euros all the way for me.
So me being interested in Halls of Hegra might seem a bit odd, especially since the Second World War as a setting is something I in particular dislike. However, I am a solo player and I’m more and more getting into historical gaming. Probably my favourite experience in that sense is John Company Second Edition as it managed to both be interesting as a game but also forced me to think like one of the actors in this dreadful company. It was great! I even bought two books on the topic because I was so fascinated by how it was even possible for those events to occur in history. Would Halls of Hegra be able to do the same? I had heard so many great things about it, some even calling it their solo game of the year, so I had to check it out …

Setup
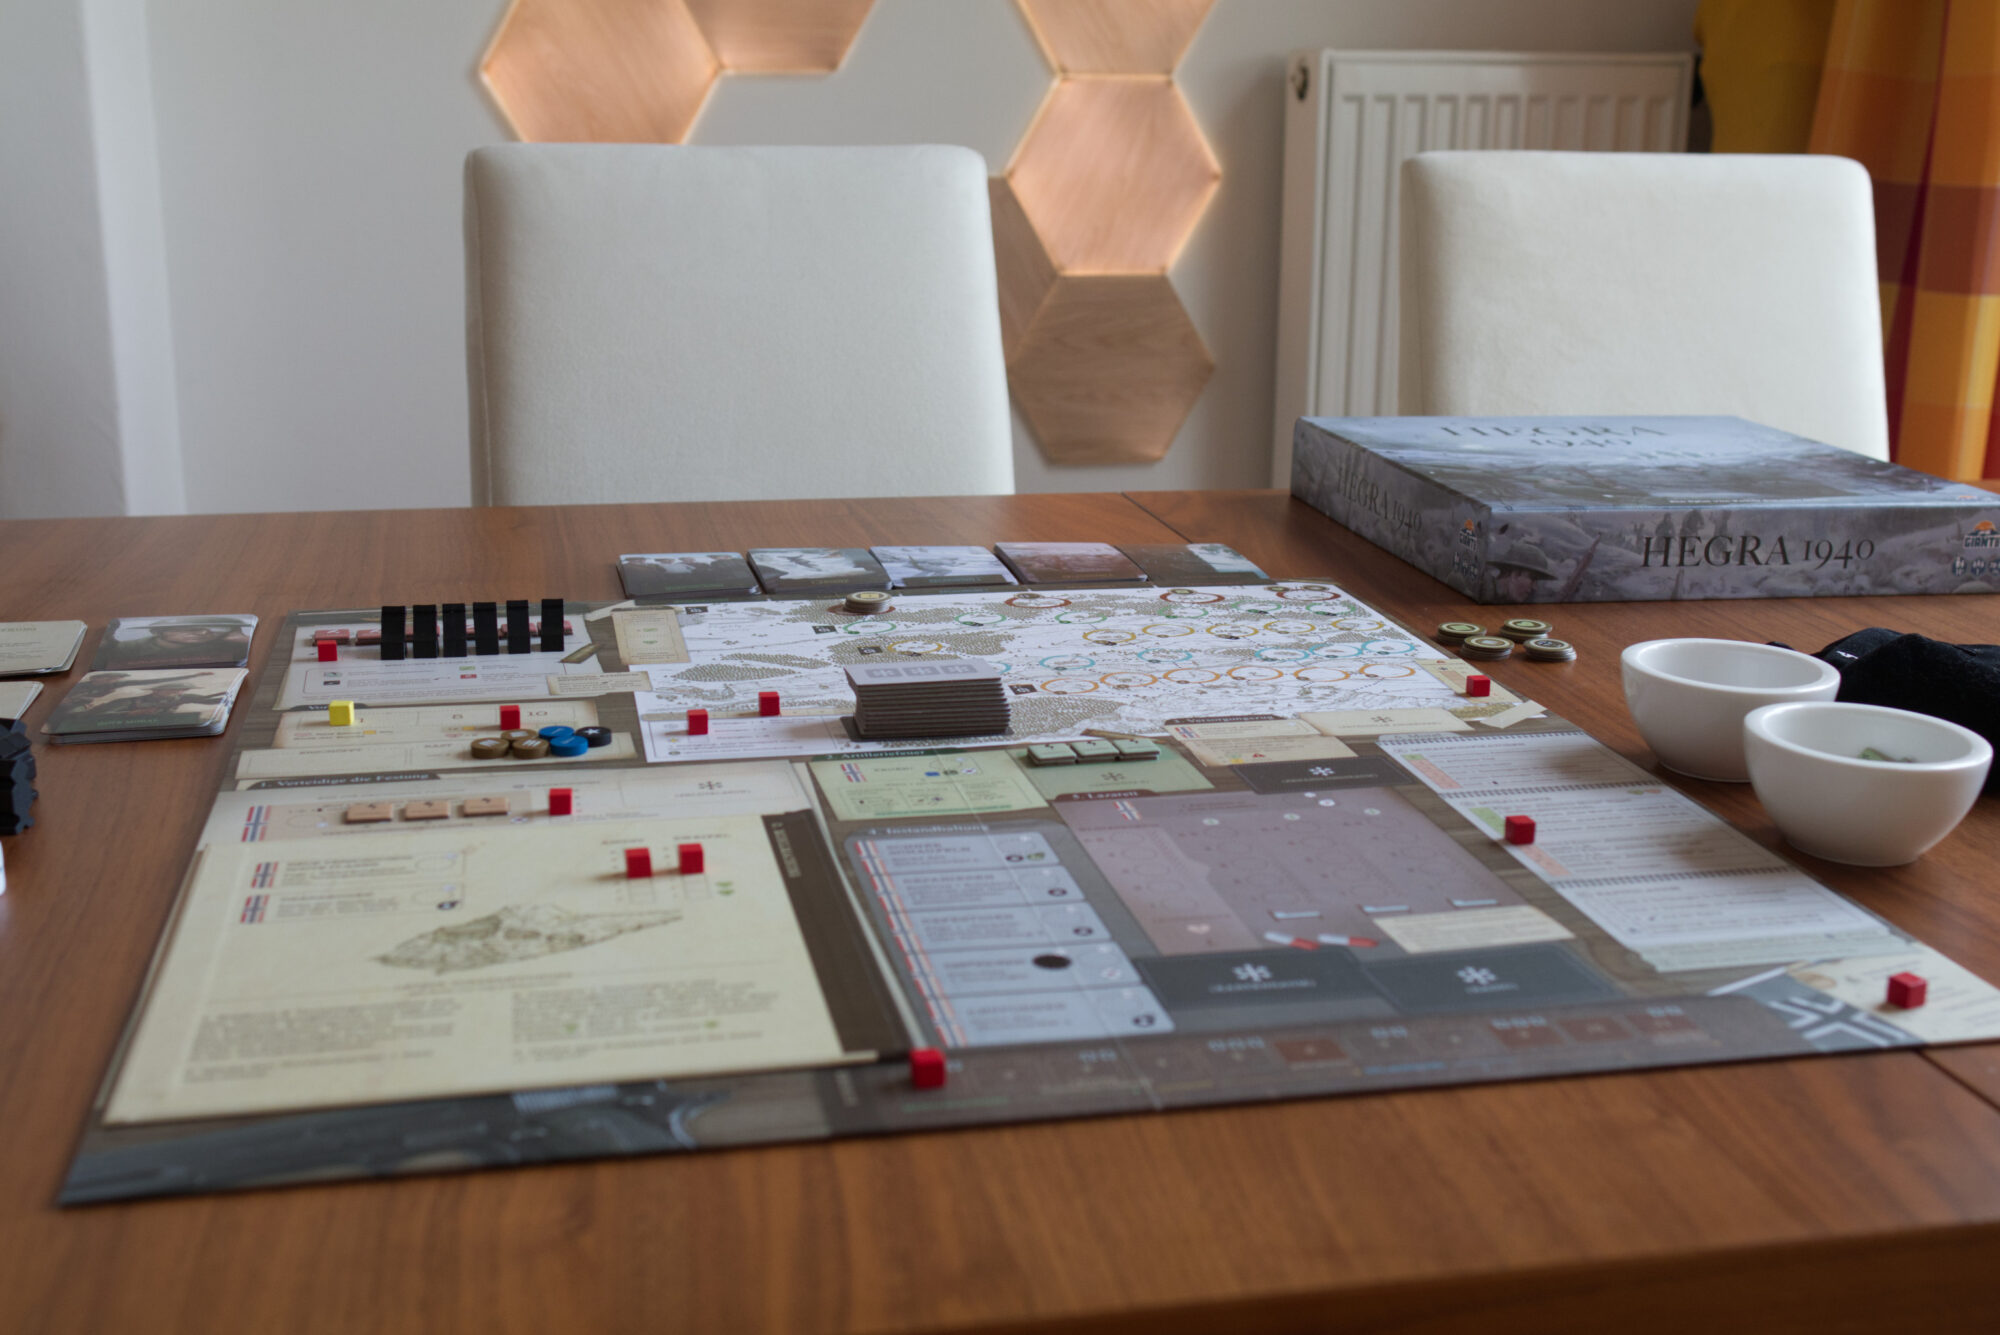
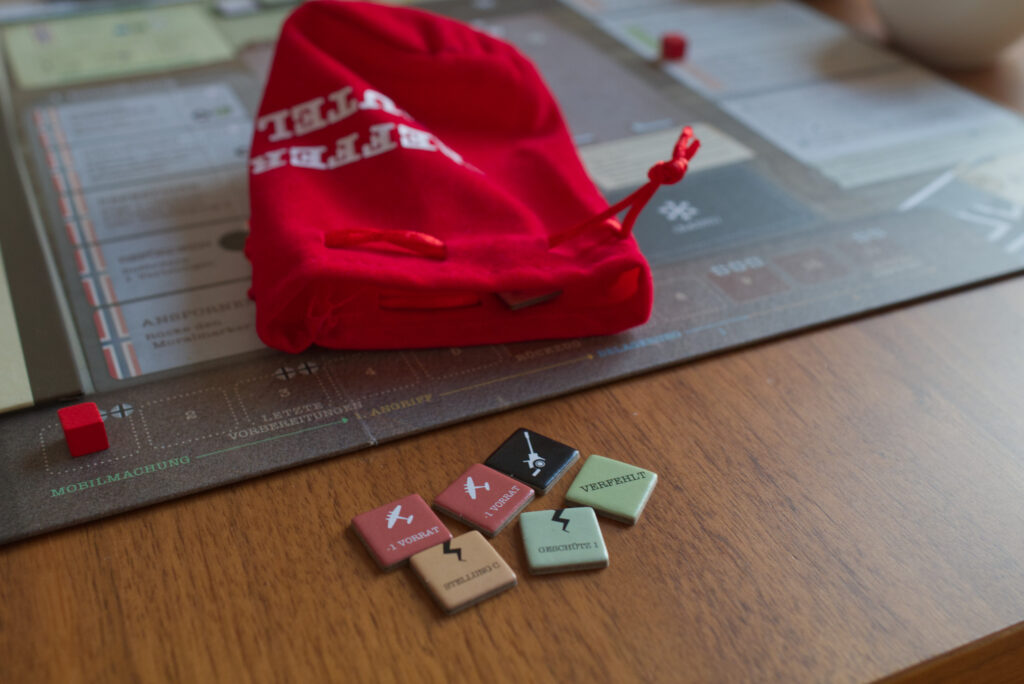
Setting up a session of Halls of Hegra doesn’t take annoyingly long, but it is more involved than I had anticipated and longer than I would have liked it to be. The main board shows a multitude of different areas – each with their own separate function – and thus can be a bit overwhelming and disorienting on first view. But in essence, there is an event deck split into the four acts of the game (plus one so called “last attack”), four additional decks for the effects of low or high moral, a sizeable collection of various rather bland cardboard chits that reminded me of a GMT game, small wooden discs that represent the defenders, larger wooden meeples and canon pieces that represent the attackers, some surprisingly tiny dice, and three bags that need to be pre-filled with a specific combination of chits and wooden discs. More about those later.

This isn’t the type of game where you can just open ziplock bags, throw everything into bowls and are good to go. Instead, setup has 17 steps plus sub-steps, and so playing a session of Halls of Hegra usually starts with opening the rulebook and referencing what number of what things get thrown into what bags or not. What is strange here is that some of the required information is printed on the board (e.g. for tracks there is a dash under the number where the marker cube is starting off from) while other aspects are not. For example, the default order of air attack tiles could just have been printed on the board. But it’s not, likely because the rules also contain a variant where their order is randomised. Or the number and types of defenders one is starting with, that can also only be found in the rules.

It’s not atrocious, but every time I sat down to play Halls of Hegra, I noticed myself issuing a silent sigh as I shuffled the various decks and sorted cardboard chits. It was this feeling of wanting to eat something instead of having to cook it for an hour first.
Game Structure
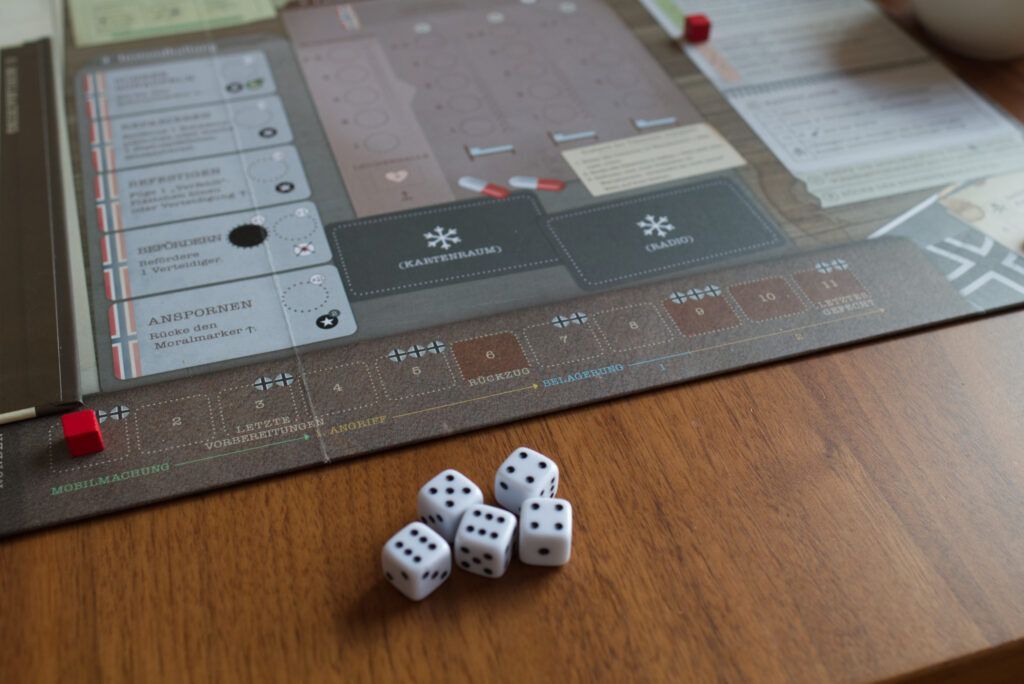
There is a whole slew of mechanisms in this game, so many that I won’t discuss them all or in detail. What it boils down to is that the solo player is managing a group of Norwegians – to large extends consisting of volunteers – that tries to defend an abandoned mountain fortress against the onrush of German forces during World War II. This happens in four acts, spanning 11 days (=rounds) total: the first couple of days are the mobilisation phase of relative quietness which the defenders use to prepare, mostly by gathering people and supplies. This is followed by the first attack where enemy infantry is trying to storm the fortress and then two phases of intensifying sieges. If the player managed to survive this long, a “last stand” happens which causes yet another attack after which the player needs to have a certain number of still unwounded defenders to win the game.

Each of those phases introduces new mechanisms, which is also reflected on the board. There is a small mini-board that is placed on top of the main board in the lower left corner. On one side it contains the actions only possible during the mobilisation phase, on the reverse the first attack, and when removed reveals the previously covered part of the main board underneath. The rest of the main board shows the actions that stay available throughout the game as well as a map of the region.

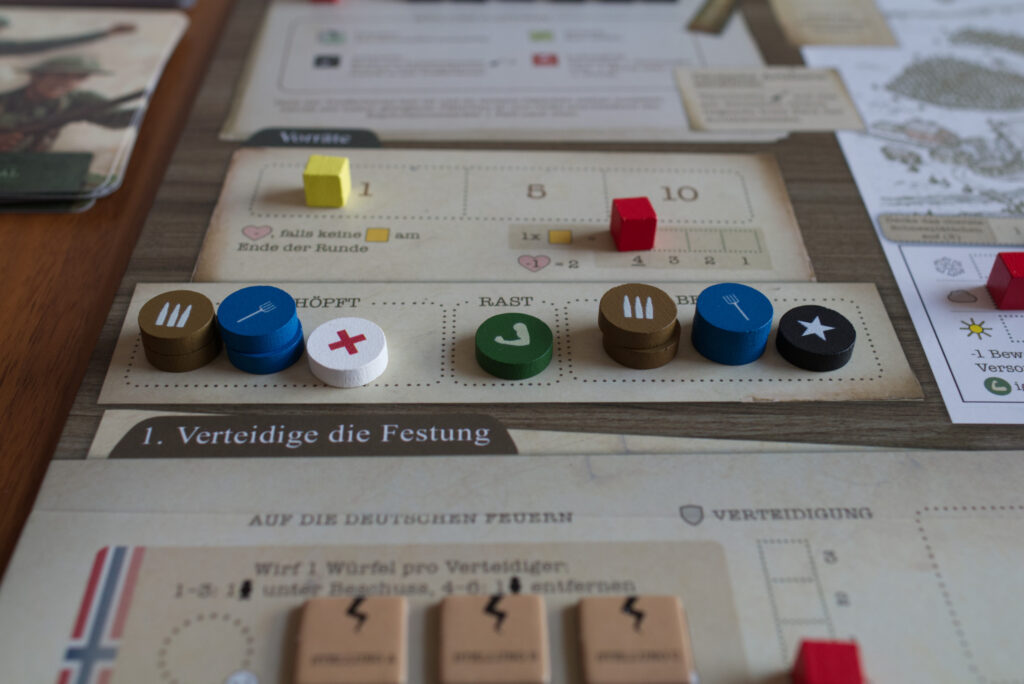
Each round in Halls of Hegra starts by drawing an event card and following the instructions printed on them. They contain the weather conditions of that day (from sunny to snowy), some penalty (e.g. losing supplies, someone gets wounded) and then an iconographic reminder of the steps that happen during that act of the game. After that, the player pays supplies to basically buy workers for the round, moving them from being tired to being ready to work – which seems thematically a bit odd now that I think about it. Maybe it’s coffee, who knows. Those can then be placed on various action spaces all over the board and once ready, the action spaces are processed in a pre-described order.

There are a few general categories of actions: manning the defences against infantry attacks, doing supply runs on a map while dodging German patrols, firing artillery, repairing/maintaining the fortress, and patching up wounded defenders in the infirmary.
Once the round is complete, the moral of the defenders is evaluated and based on that, the player either gets some additional bonuses or penalties by drawing from the respective moral deck, one for positive and one for negative effects. New patrols are added to the map, making further supply runs more difficult, and then the turn marker is moved forward on the turn track at the bottom of the map.

Since there are so many different actions to chose from, it doesn’t really make sense to go through them in detail here. Instead, let me describe the choices you’ll have to make based on the different phases the game is in.
Act 1 – Mobilisation
During mobilisation, your main tasks are to scout new supply routes, do supply runs, and in general invest in the fortress. This can either happen by building up fortifications (reducing the amount of damage infantry attacks will be able to cause), shovling in snow (revealing items ranging widely in usefulness, from just some supplies to a new action spaces), or boosting moral (aiming for those end of round bonuses). You can also fight against growing fears among the defenders, the amount of which will determine how many defenders you’ll lose instantly at the end of mobilisation.
While the euro-gamer in me wanted to immediately shovel as much snow as he could to get those upgrades, the key here seems to be to unlock all supply routes and get defences up. Actually using the supply routes can be pushed back to later, but only during mobilisation is there an action to actual put those supply caches on the map. Having a sufficient number of supplies is important as without them, moral will tank and the number of workers one will be able to use per round will be limited.
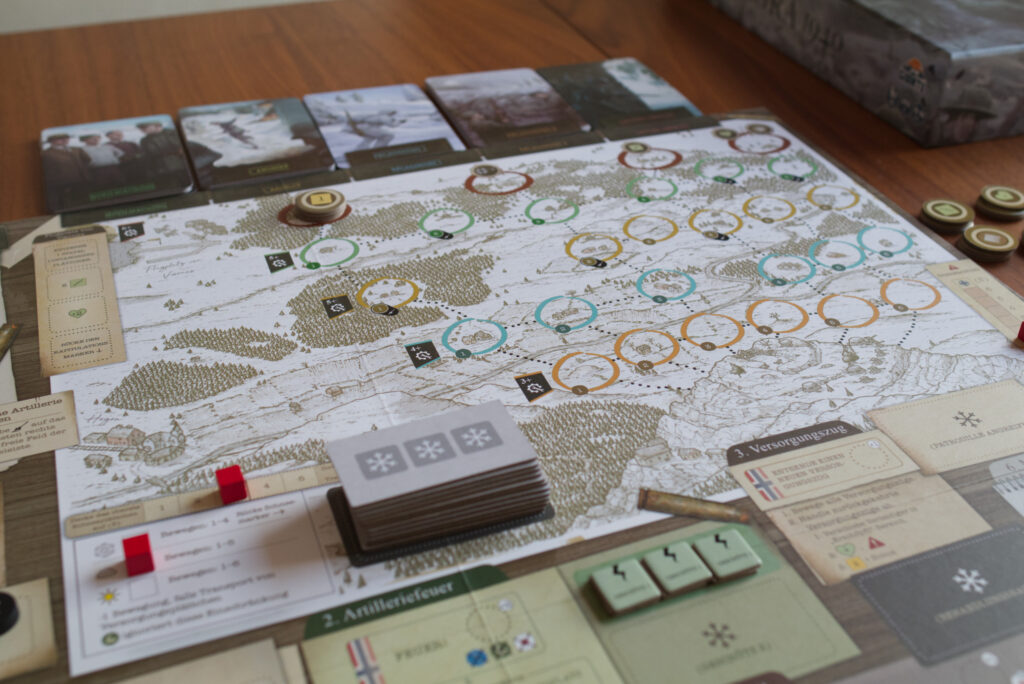
In order to do a supply run, one of the defenders has to be send out on the map and they will move a number of spaces depending on the current weather. If they cross paths with a patrol, they can either end their movement, sneak past them (running the risk of being discovered, e.g. having a bad die roll), or attack the patrol (also a die roll). Each of these actions changes the level of suspicion among the patrols and makes subsequent die rolls more difficult. The range of movement is of course affected by the weather conditions and whether they are carrying a supply or not. Various supply caches provide various bonuses from additional supplies to extra defenders.
There is another element in this phase that has huge consequences: getting new defenders. This happens during the event phase at the start of the round by first throwing an additional purple “doubt” disc into a draw bag before pulling up to four defenders out of there. The player can decide how many discs to draw, but if there is one doubt disc among them, they will only get one of the defenders and the rest is even removed from the game completely.

Building up defences on the other hand is a typical case of “you don’t need them now but will hate it if you don’t have them later”. So while this is an action that can be done all through the game, it’s important to start early during mobilisation and before the first attack happens.
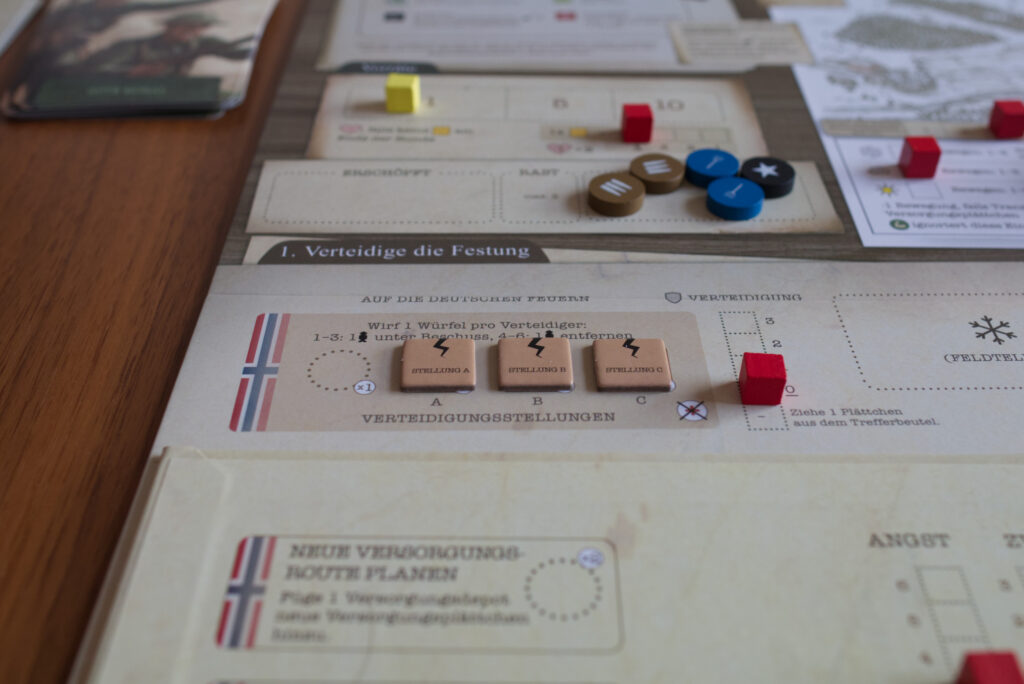
The whole mobilisation ends by flipping over the mini-board, removing defenders from the bag based on the level of fear, lowering the rate of how many defenders can be unexhausted per unit of supply and manning the defensive positions … which you’ll need to spend worker on repairing as well. Three of the four defensive positions start with a cardboard chit on top of them that can be removed by the repair action, a mechanism that can be found in other areas of the game as well.
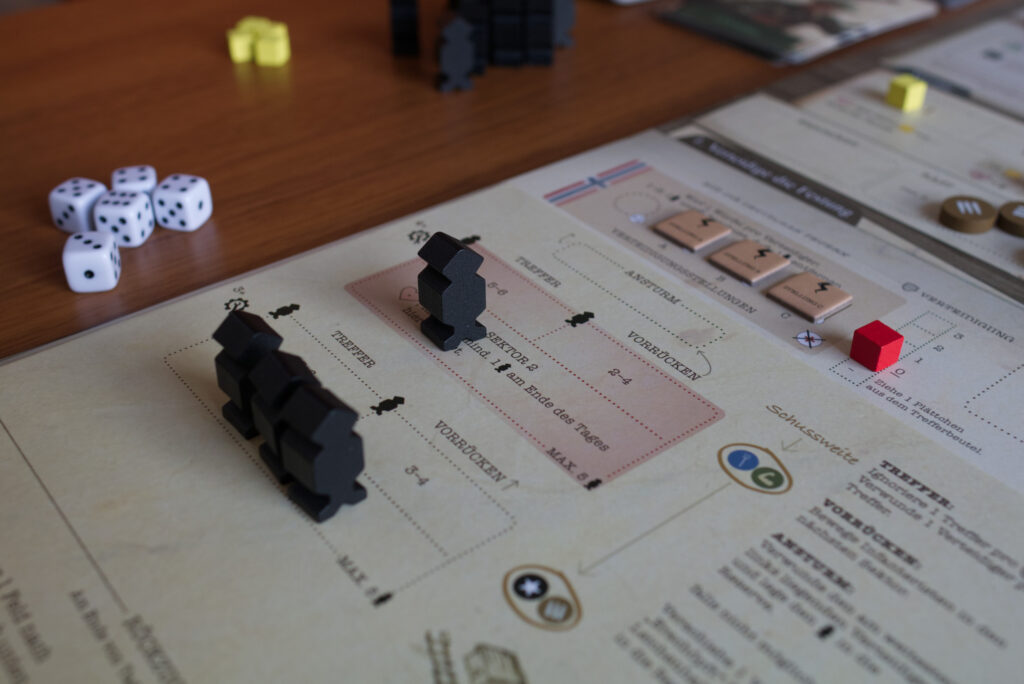
Act 2 – First Attack
The first attack adds a completely new element: black, oddly large meeples that now advance towards your defences and try to storm them. As part of processing the event of the round, all meeples here will – based on die rolls – either do nothing, advance, or fire and thus wounding defenders. As a counter-action, defenders can be placed into the defensive positions and during processing of all action spaces, those will fire and pin down or remove attackers.
So let’s talk about wounded defenders. As if there weren’t already enough problems to manage, various things (attacks, air raids, event cards, moral cards, …) can wound a defender. If this happens, a die is rolled and that decides how badly wounded the defender is and thus how low in the infirmary they are placed. There are three beds and a waiting area. Each round, those in the beds automatically get healthier and eventually get back to duty, and all in the waiting area get sicker as they wait for a bed to free up. The player can also place defenders on an action spot to accelerate the process of getting defenders back to heath.

This might also be a good point to talk more specifically about the various types of defenders. There is a single officer and multiple soldiers, volunteers, medics, and hunters. Some action spots are marked such that placing a particular defender there counts double, e.g. a medic in the infirmary. Also some spaces block certain types of defenders from going there, e.g. the officer won’t shovel snow and a medic will never go into the defensive positions. Hunters have less penalties on supply runs and soldiers have a wider reach when shooting from their defensive positions.
In general, the attack is mainly a race to get defences up (=less wounded defenders), reduce the number of attackers, and patch the wounded back to health before they ruin moral completely.
Same as with mobilization, the first attack section of the game is concluded by performing a special intermission called “the retreat”. The mini-board is now completely removed, revealing a longer infantry attack track underneath. Also artillery pieces are placed on the map, joining any already existing enemy patrols and defenders on supply runs.
Act 3 & 4 – The Siege
The siege adds yet another threat by introducing the hit big. During each event phase of the siege, two air tiles are added to the hit bag and artillery on the map. Then the player must draw a number of chits from the hit bag (which can be reduced by destroying the artillery on the map) and thus various places in the fortress get damaged, supplies hit, and defenders wounded.

The effects of this can be reduced by using an action spot to place “missed” chits in the bag. It is quite vital to keep the hit bag well-filled as there are severe penalties when it runs out. One way to do this is to repairing equipment (guns, defending positions, etc) in the fortress as the chits go into the bag, not out of the game. This adds an interesting but also quite frustrating mechanism of first repairing something (e.g. an artillery gun) and then getting it damaged during the next attack again. Even worse, if you’re repairing for example a defensive position to then place a defender in there in order to block the next infantry attack, the chit goes in the back and if it is drawn, not only is that position damaged but also the defender wounded. Very thematic, but super frustrating if you have few chits in the bag and can almost be certain of the thing you just repaired getting broken again.
Game End – The Last Stand
If the player has managed to survive all eleven days and no condition has been triggered to make them surrender (which can for example happen if too many defenders get wounded or the hit bag runs empty too often), a card is drawn from the last stand deck (only 3 cards) and a last, even more aggressive infantry attack is performed. If after that the player has more unwounded defenders than indicated on the surrender track, they win.

This might not sound that bad but is actually quite the tall order. The constant waves of attacks and air tiles drawn, negative moral and event cards all contribute to the defending forces always being close to collapsing. Every defender wounded is another worker that’s missing for performing actions or doing new supply runs. Every supply run not working out is another shortage of rations that has to be compensated by dropping one’s own moral. Every piece of equipment fixed is another target that likely gets destroyed during the next attack.
Bonus Material
I was surprised to find a couple of optional modules towards the back of the rule. The base game itself already introduces so many mechanisms that I felt it would stay fresh for a long time. Nevertheless, there are a couple even more difficult event cards that can be added, two additional chits to shorten the number of days before the mobilisation/first attack phase ends, and mission cards that give you additional objectives. Don’t expect much, it’s just a handful of cards and two cardboard chits, but still nice that the publisher put it in the box.

There is also a 4 page re-telling of the actual historic events that inspired the game, which is something I always appreciate.
Conclusion
Halls of Hegra stands out to me by having just the right amount of meat on the bone to be a great solo experience. It is a bit of a drag to learn the game due to the number of mechanisms and the somewhat sad quality of the rulebook unfortunately doesn’t help either. There are elements that are simply not explained at all (e.g. how to set up artillery gun 2), implications of things left open for the player to discover (e.g. why does the supply-to-unexhaust track go to one if there are only 2 phases where it is moved down?), no glossary (good luck finding the one place explaining what that “rest” box on the board does). The worst thing for me though is that it keeps the rules in chronological order, even though the event phase of the game changes substantially between mobilisation, first attack, and sieges. There’s simply a “jump to page X” remark and that’s it. I had the strong impression the rules could have been written clearer and learning the game would have been less intimidating if the elements of the first attack and siege were introduced after the player got a read through the whole of the mobilisation phase.
Once one grasps all the “why should I even do this?” of the many elements though, the flow of the game is very nice: draw event card, perform things printed on it, unexhaust workers by spending supplies, place them on action spots, perform actions, end of turn moral checks and add new patrols, done. Each of the individual actions is rather quick to perform, leaving more time for planning what you want to do this round. Having different acts in the game over the course of the 11 days also helps keeping the experience fresh.
Also on the plus side is that a lot of the mechanisms feel very thematic. From the supply runs to the consequences of there not being enough food, attacks causing defenders to spend time in the infirmary and the disastrous results of casualties to moral, there are many things that make you feel the desperate situation the defenders were in.
Where Halls of Hegra unfortunately takes a huge turn for me though is when I see it less as a historical experience but simply a game. While there are many cool ways how the different mechanism interlock, there is something constantly nagging me, wondering if my success is due to my clever planning or me just being lucky … or more correct: less unlucky than usual. Take for example the way one gets new defenders: each round, a new doubt disc is thrown into the bag and then 1-4 defenders are pulled. The difference between pulling four defenders and pulling a doubt disc is tremendous. It’s not only that one gets less workers, making all of the rest of the game harder, but also all drawn defenders except one are actually removed from the bag, worsening the chances of mobilising defenders in subsequent turns! Sure, a push-your-luck element can be fun, but this feels like Russian Roulette: 2-3 bad draws and you might as well reset the game. I had one play where I drew purple discs as the first or second disc for all three days of mobilisation and I might as well have stopped the game there. There is no mechanism or clever play I could have done to compensate for this.
It’s similar with the weather system & supply runs. Getting a steady trickle of new supplies is essential to having sufficient enough active workers and the small boost of moral from completing a run is also something the defenders desperately need. If things went very well, I found myself parking returning defenders in front of the fortress so I could better time when the positive moral boost happens. If things didn’t work out, it again was a question of should I continue this? The fact that defenders end their whole movement when reaching a supply cache strikes me as really odd. Here is why:
The shortest path to any supply cache is 5 steps and weather conditions produce a movement range of 4-6. A defender carrying supplies loses one movement point, except for the few hunters which you might or might now draw from the bag. If the first day ends up being a snow day, it will take until end of turn three or four before getting your first supplies. The snow day gives 4 steps, enough to move just in front of the supply cache, next turn is completely wasted by moving into it, third turn heading home the defender’s movement is reduced by one, so unless the sun is shining (or they are a hunter, of which you don’t have any at the start of the game), they won’t make it back home. I think the much better solution (and more thematic) would have been to have moving in and out of a supply cache cost extra movement points but not end the turn. It feels to me like the whole idea of having another element that might completely screw the player over without their own doing was just too tempting to add for thematic/realism reasons.
So for the sake of argument, let’s assume you have an okay start. The weather wasn’t great but okay, you got at least some defenders out of the bag. There are now multiple paths you might want to follow: should you immediately start shovelling snow to get better action spaces, immediately raise defences to lose less people during attacks, repair the artillery gun? This seemed exciting at first but I found the game’s mechanisms almost forced me to respect a certain sequence. For example, during mobilisation, there was hardly any time to dig for new equipment as it’s vital to open up new supply routes (which can only be done during the mobilisation phase of the game), repair the defensive positions, raise the level of protection, and of course start the first supply runs. If I would deviate and invest in some digging, the results would a) be subject to a lot of randomness (some things might be super helpful, some things I would never get the chance to use), and b) the opportunity cost of not repairing the defensive positions would be too high over the course of the rest of the game. So I felt myself falling into the same routine and patterns formed very quickly.
Which brings me to the event deck, yet another element of randomness in Halls of Hegra: ideally, event cards in a game force you to adapt, be open for the unexpected, find clever new strategies that you normally wouldn’t use. Here though it felt less like something that changed my thinking but something that changed the difficulty of the game mid-game: draw some cards and you just shrug, draw others and you consider resetting the game. Same for the infirmary: each time a defender is wounded, it’s just up to luck if that’s no problem at all (5-6) or something that will drain serious resources for multiple rounds (2-3).
And that pretty much sums up where I ended up with Halls of Hegra. As a historical experience, it’s great. Sure, there are a lot of elements to learn, but the game length feels just right for a solo game, the different phases of the attack keep the mechanisms fresh, actions are quick to perform, and overall the desperation of the defenders is tangible. It’s a game of shortages, always wondering how you’ll survive the next round without disastrous casualties but sometimes having to accept them and persevere. As a game though, it suffers from too many sources of randomness with not enough agency for the player to work with it. Imagine a game where you roll 3D6 at the start and that tells you if you this time you have to play in easy or insanely difficult mode. If you’re fine with that and say “that’s what life is like”, you’ll have an excellent time with Halls of Hegra. If you instead had a long day of work and just want a challenging but solvable puzzle, you should probably pick something that is more reliable. You might end up spending 10-15min on setup to pack the game away in frustration after the second turn …